EcoFlow Power at your Fingertips
EcoFlow Power Kit: Touch Screen Control Console
Power Kit Touch Screen Control Console: EcoFlow Power at your Fingertips
Included in EcoFlow’s new Power Kits you will find a small tablet - the Touch Screen Control Console. This device gives you the ability to monitor and control your entire off-grid or van life power system. In this article we will break down the features of this controller and give you a first look at this powerful piece of technology.
Initial Setup
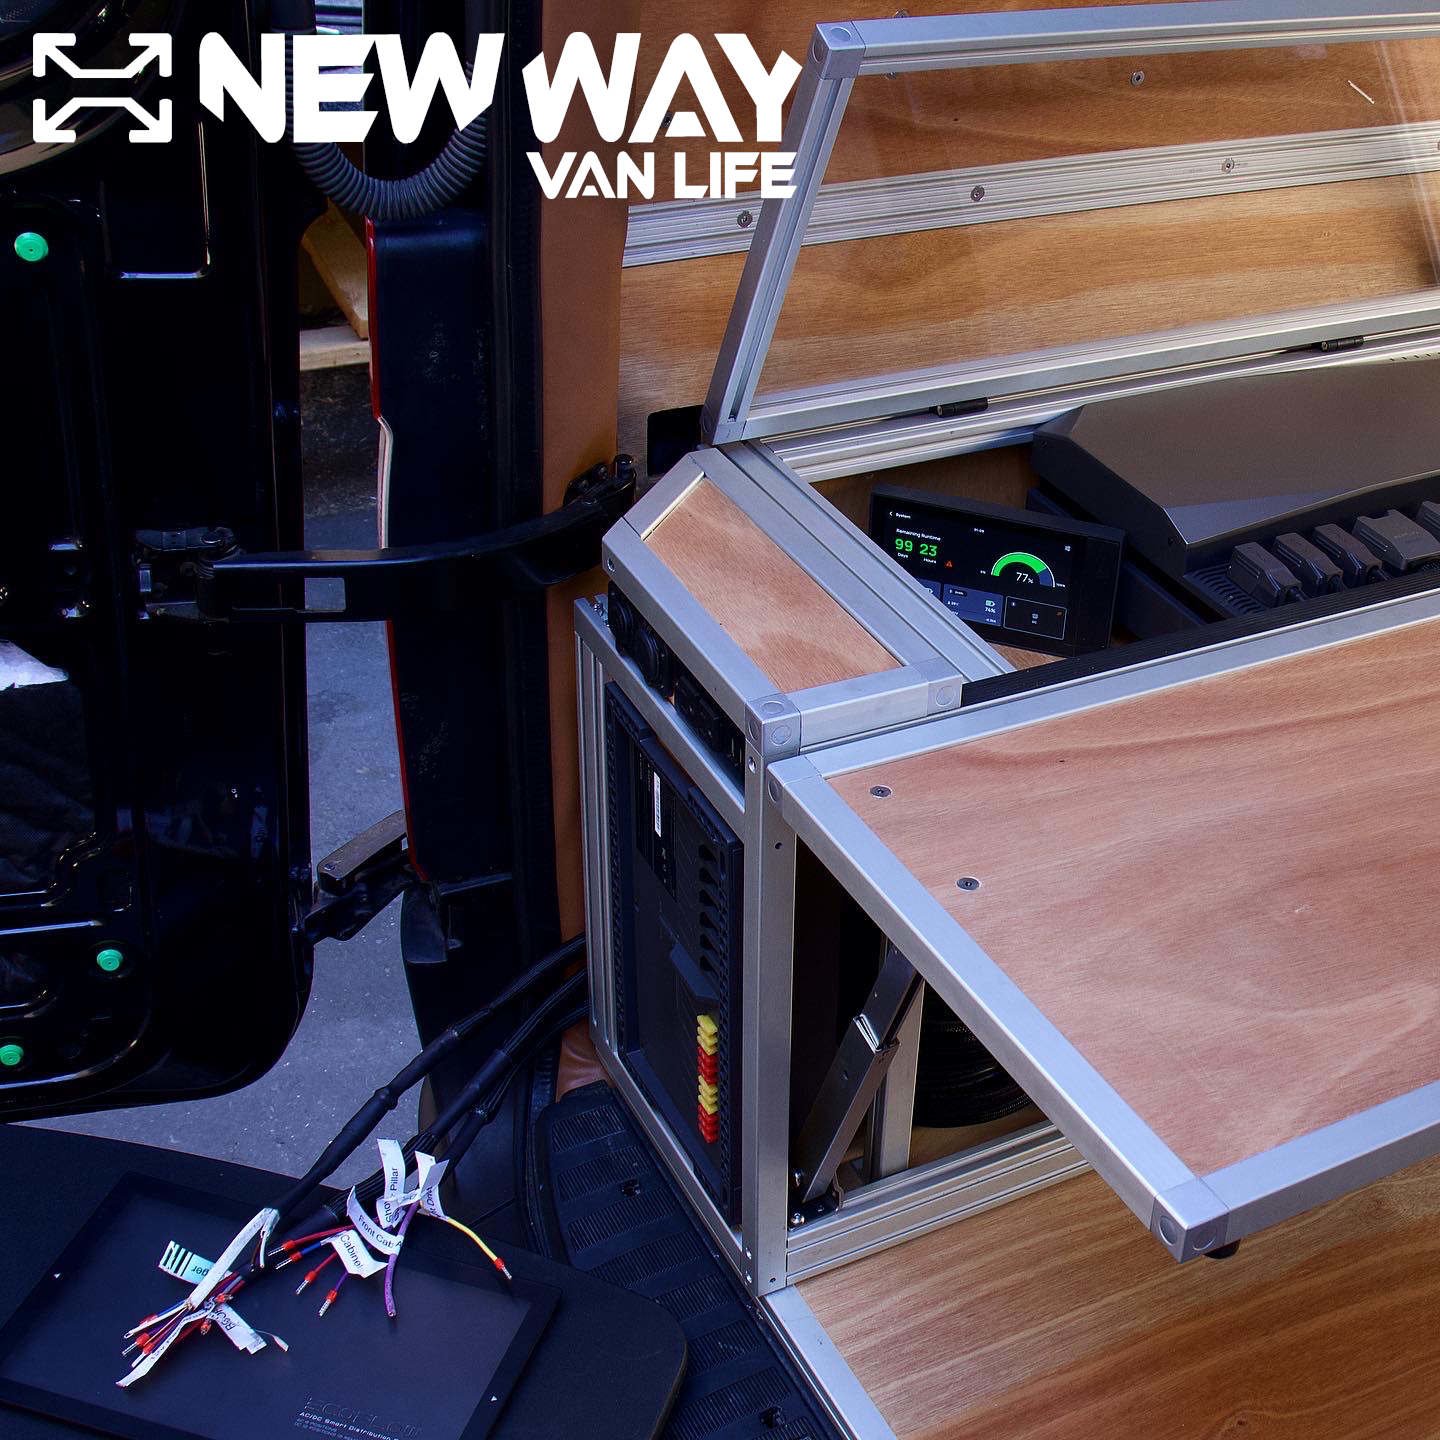
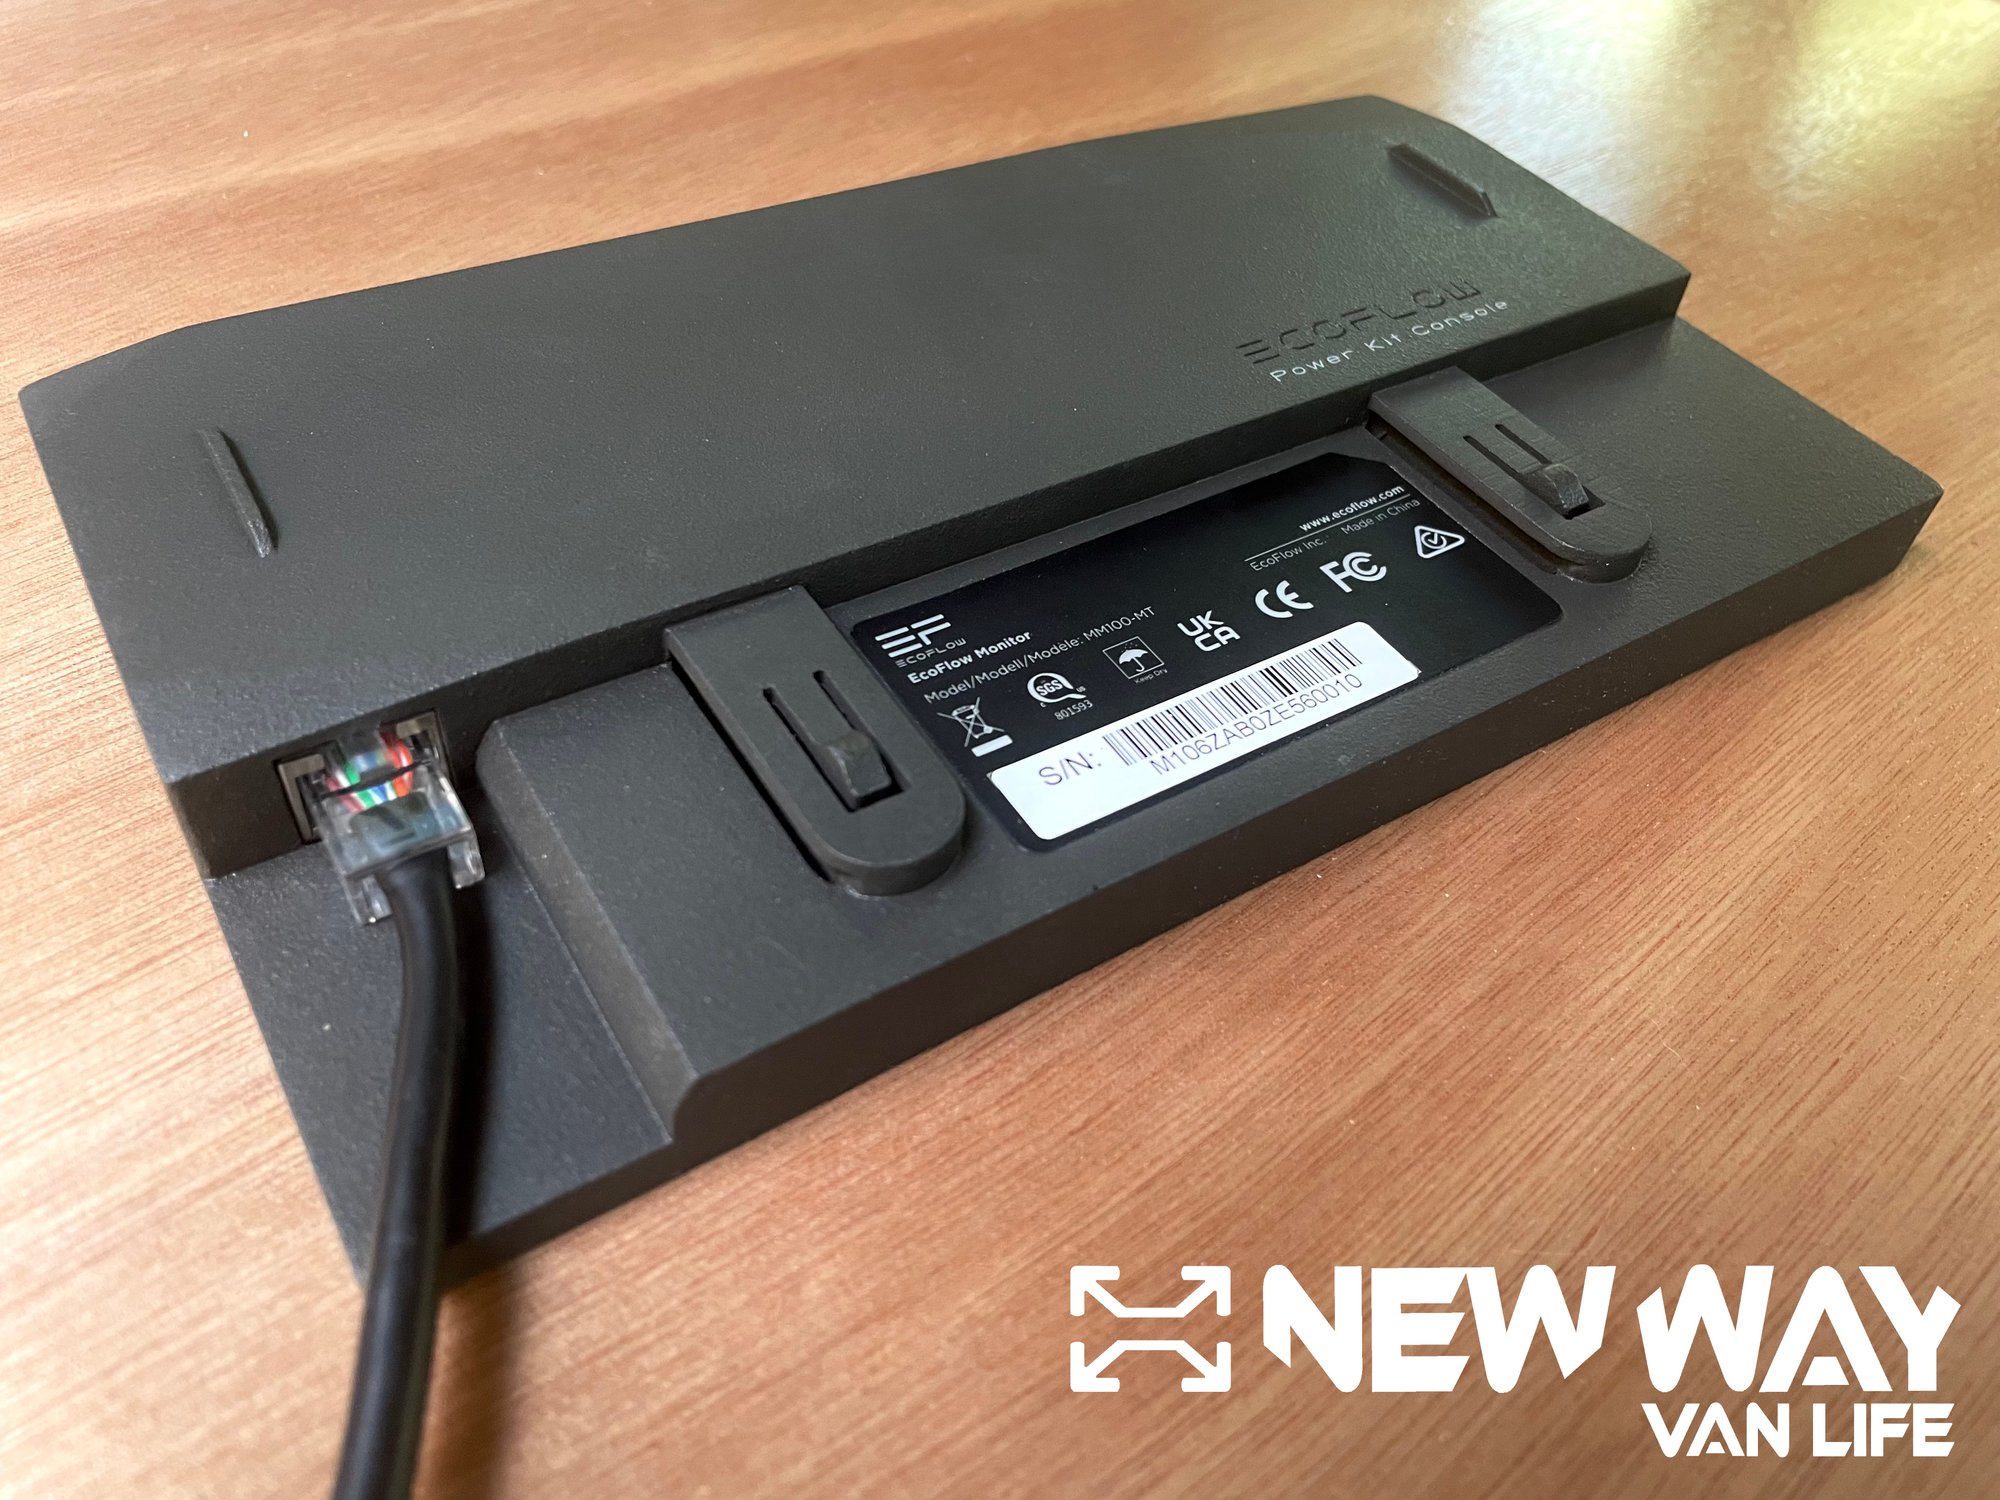
After you connect the plug-and-play Power Kit 2kWh/5kWh batteries, Smart Distribution Panel, and Power Hub together, you can power up the Control Console. Simply hold the power button for 2 seconds and the display will turn on. The controller is connected to the system via an ethernet cable. A mounting bracket is included which allows you to easily remove the controller if you would like to use the device somewhere other than where it is mounted in your van, tiny home, or whatever your application. The device has a very simple and clean design: it has a power button, 8” touch screen, ethernet port on the rear, and a USB-C port.
Home Screen
There are three sections on the Touch Screen Control Console home screen: System, Input, and Output. From this screen you can monitor and control certain data from all three sections.
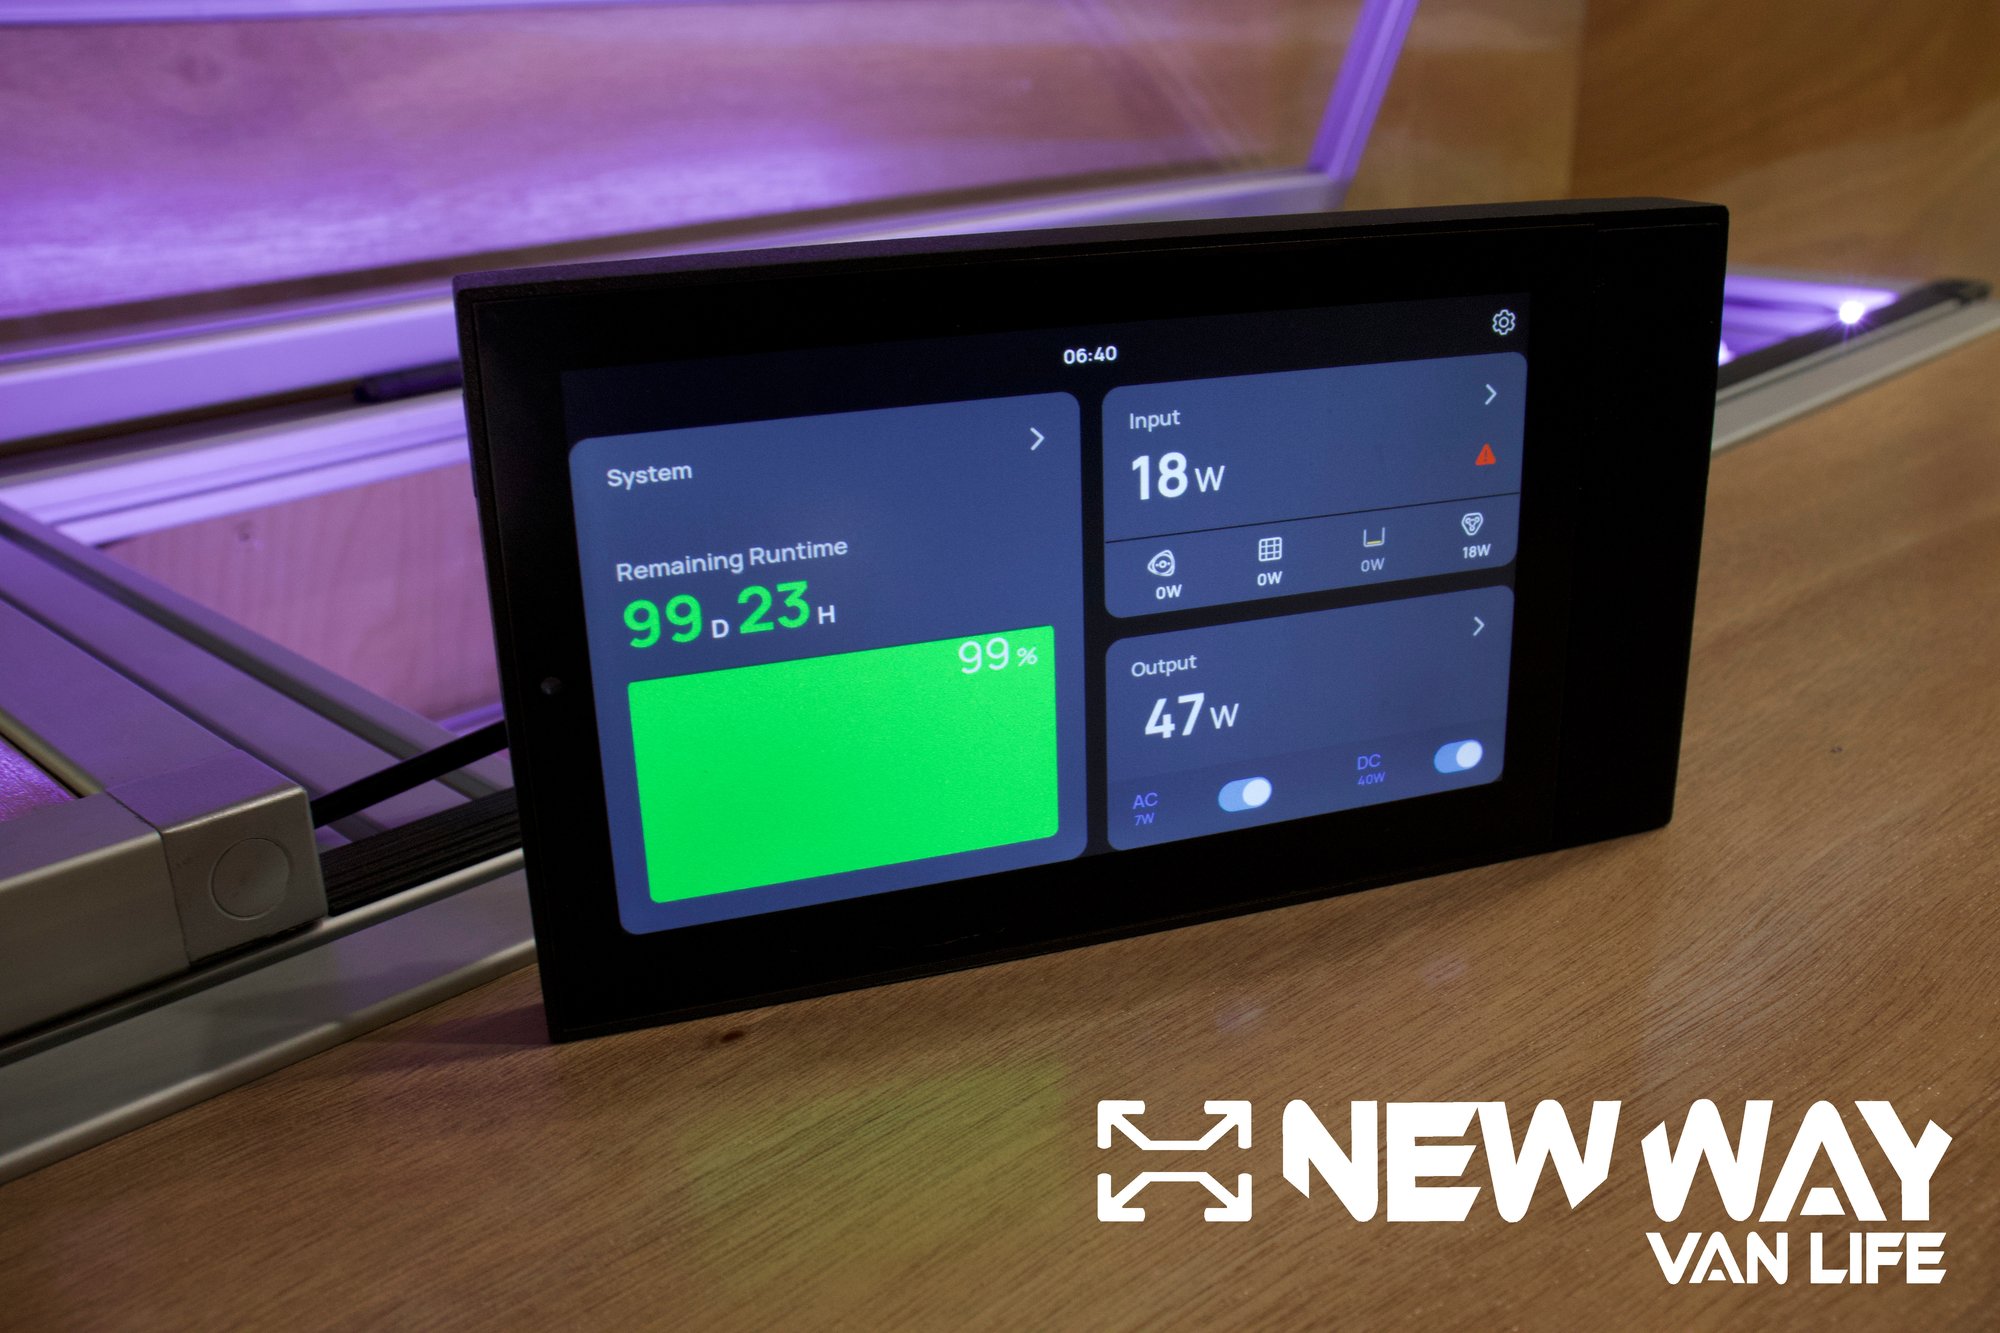
The System section displays battery life in two different ways. With just a quick glance you can see the Remaining Runtime, a time estimate in days and hours, for the system to be fully charged to your specified charge limit based on your usage and remaining battery at that time. Underneath Remaining Runtime is the percentage of battery life left in the total system. As you look over to the right side of the home screen on the display you will see the Input and Output sections or tabs.
The Input section on the home screen displays the total power in watts that your system is receiving from the input sources. Below the total input wattage, there are small icons for each input for the system: one for the vehicle charging system (alternator), two for solar input charging ports, and one for AC or shore power. Below each one of these small icons is the wattage that each input is contributing to the total watts above.
The final section, Output, has very similar information to the Input section above. The largest part of the section is the total output watts, or how much power the system is distributing to the devices connected to the distribution box into your van life build. Underneath the total output wattage, there are AC and DC specific wattages and an on/off toggle to control power being sent to each side of the system (12v and 120v) current independently.
Lastly, a gear icon in the upper right of the display is used for access to the settings tab. Here you are able to see the firmware version installed, view log information, adjust screen brightness, set screen sleep time, and connect the system to the Wi-Fi in order to connect the phone application to the Power Kit.
Each of these three sections on the home screen can be pressed to access additional controls and monitor more aspects of the system. We’ll jump into the System section first.
System
The system section is essentially about your power storage or batteries.
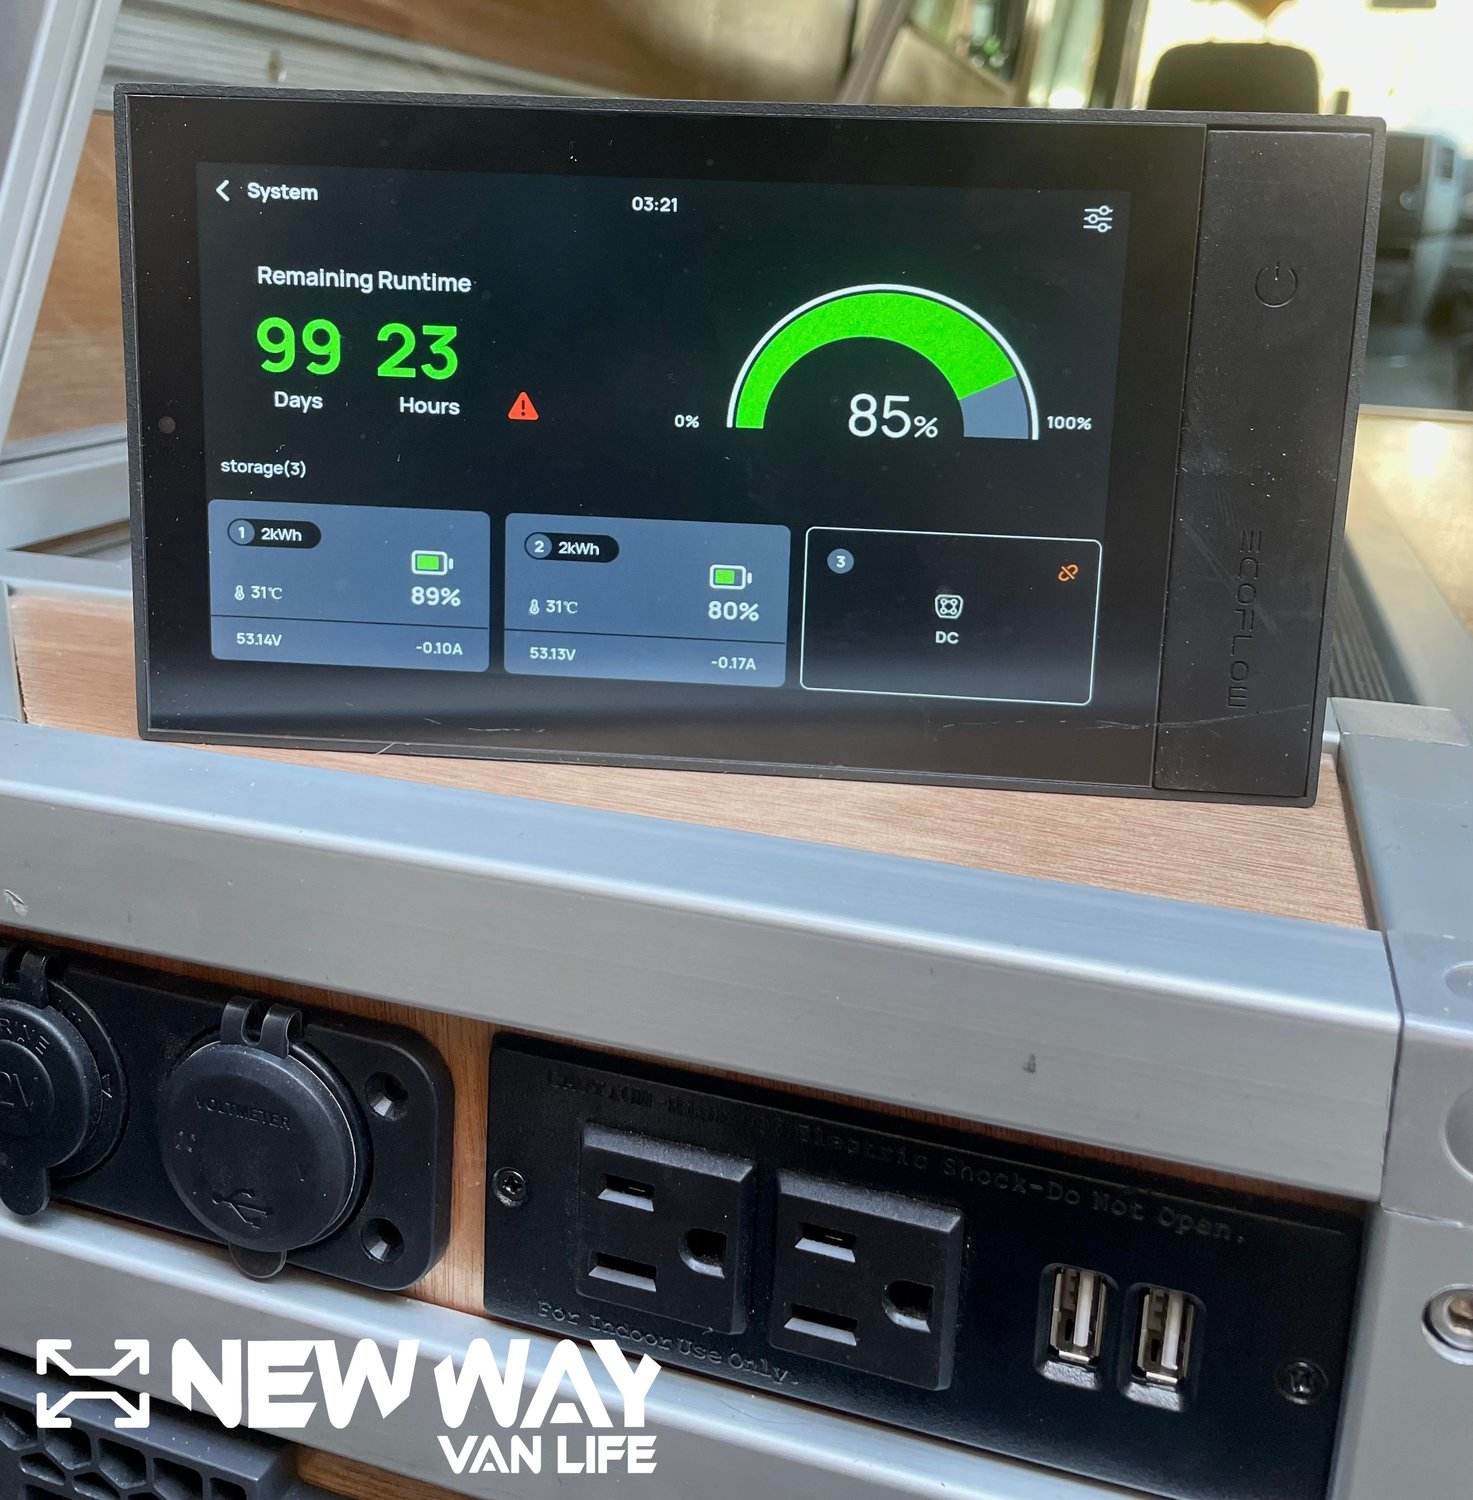
Similar to the home screen, you can view the Remaining Runtime, or remaining total power, in both days and hours as well as the percentage charge remaining. Below this information is more in-depth data for each specific battery. Each battery is represented on the screen according to which input they are plugged into on the Power Hub with the leftmost battery connection point being number 1, followed by 2 and then 3. Inside the specific battery tabs, the display indicates what size of battery is connected (2kWh or 5kWh), what temperature the battery is operating at, the percentage charge of that battery, battery voltage and amps. Beyond these monitoring options, in the upper right corner of the screen is a settings button where you can adjust the charge level and discharge level percentage of the batteries.
Input
The EcoFlow Power Kit Control Console Input section details all of the information regarding the sources that are providing power to the power kit system.
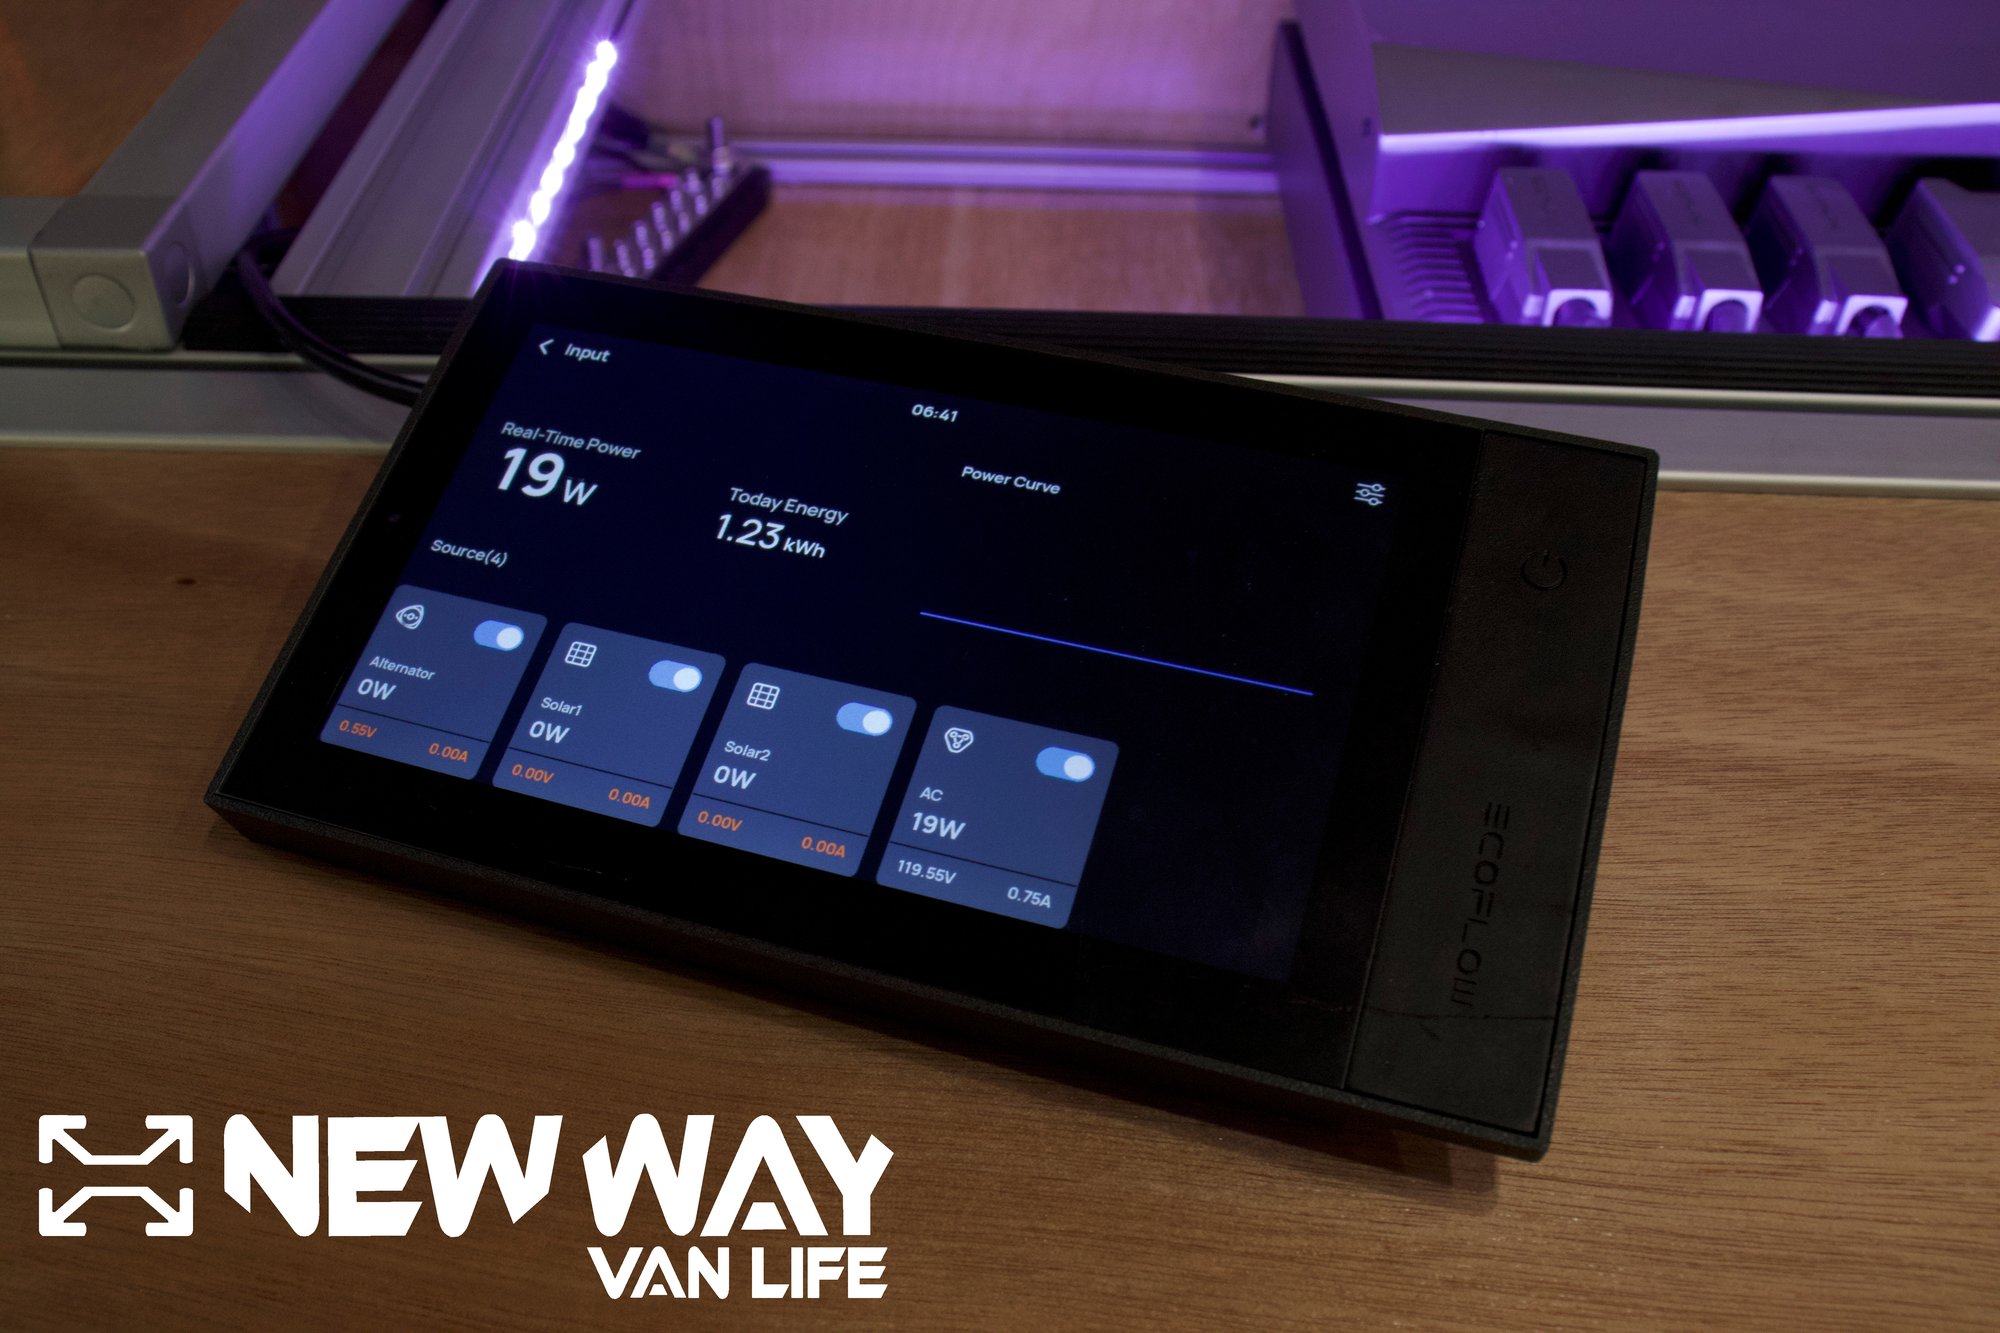
Prominent when you first open the section is the real time power that the system is receiving in watts. Next to this is Today Energy, a section which hasn't worked for us yet but we believe will display how much energy your system has received today. Below these pieces of data are the specific source information and controls for each. Each specific source (alternator/charging system, solar, and AC/shore power) has a name and icon depicting it, as well as an on/off toggle control if you want to choose manually what is powering your system. For each of these inputs, the console shows specific watts, volts, and amps. Similar to the System section, in the upper right corner of the display there is a button to access the settings where you can adjust the amps that you are capable of drawing from the alternator (5a-60a) and the AC Input (1a-30a).
Output
The EcoFlow Power Kit Control Console allows you to monitor every circuit in your system and even control six of the DC 12 volt circuits remotely.
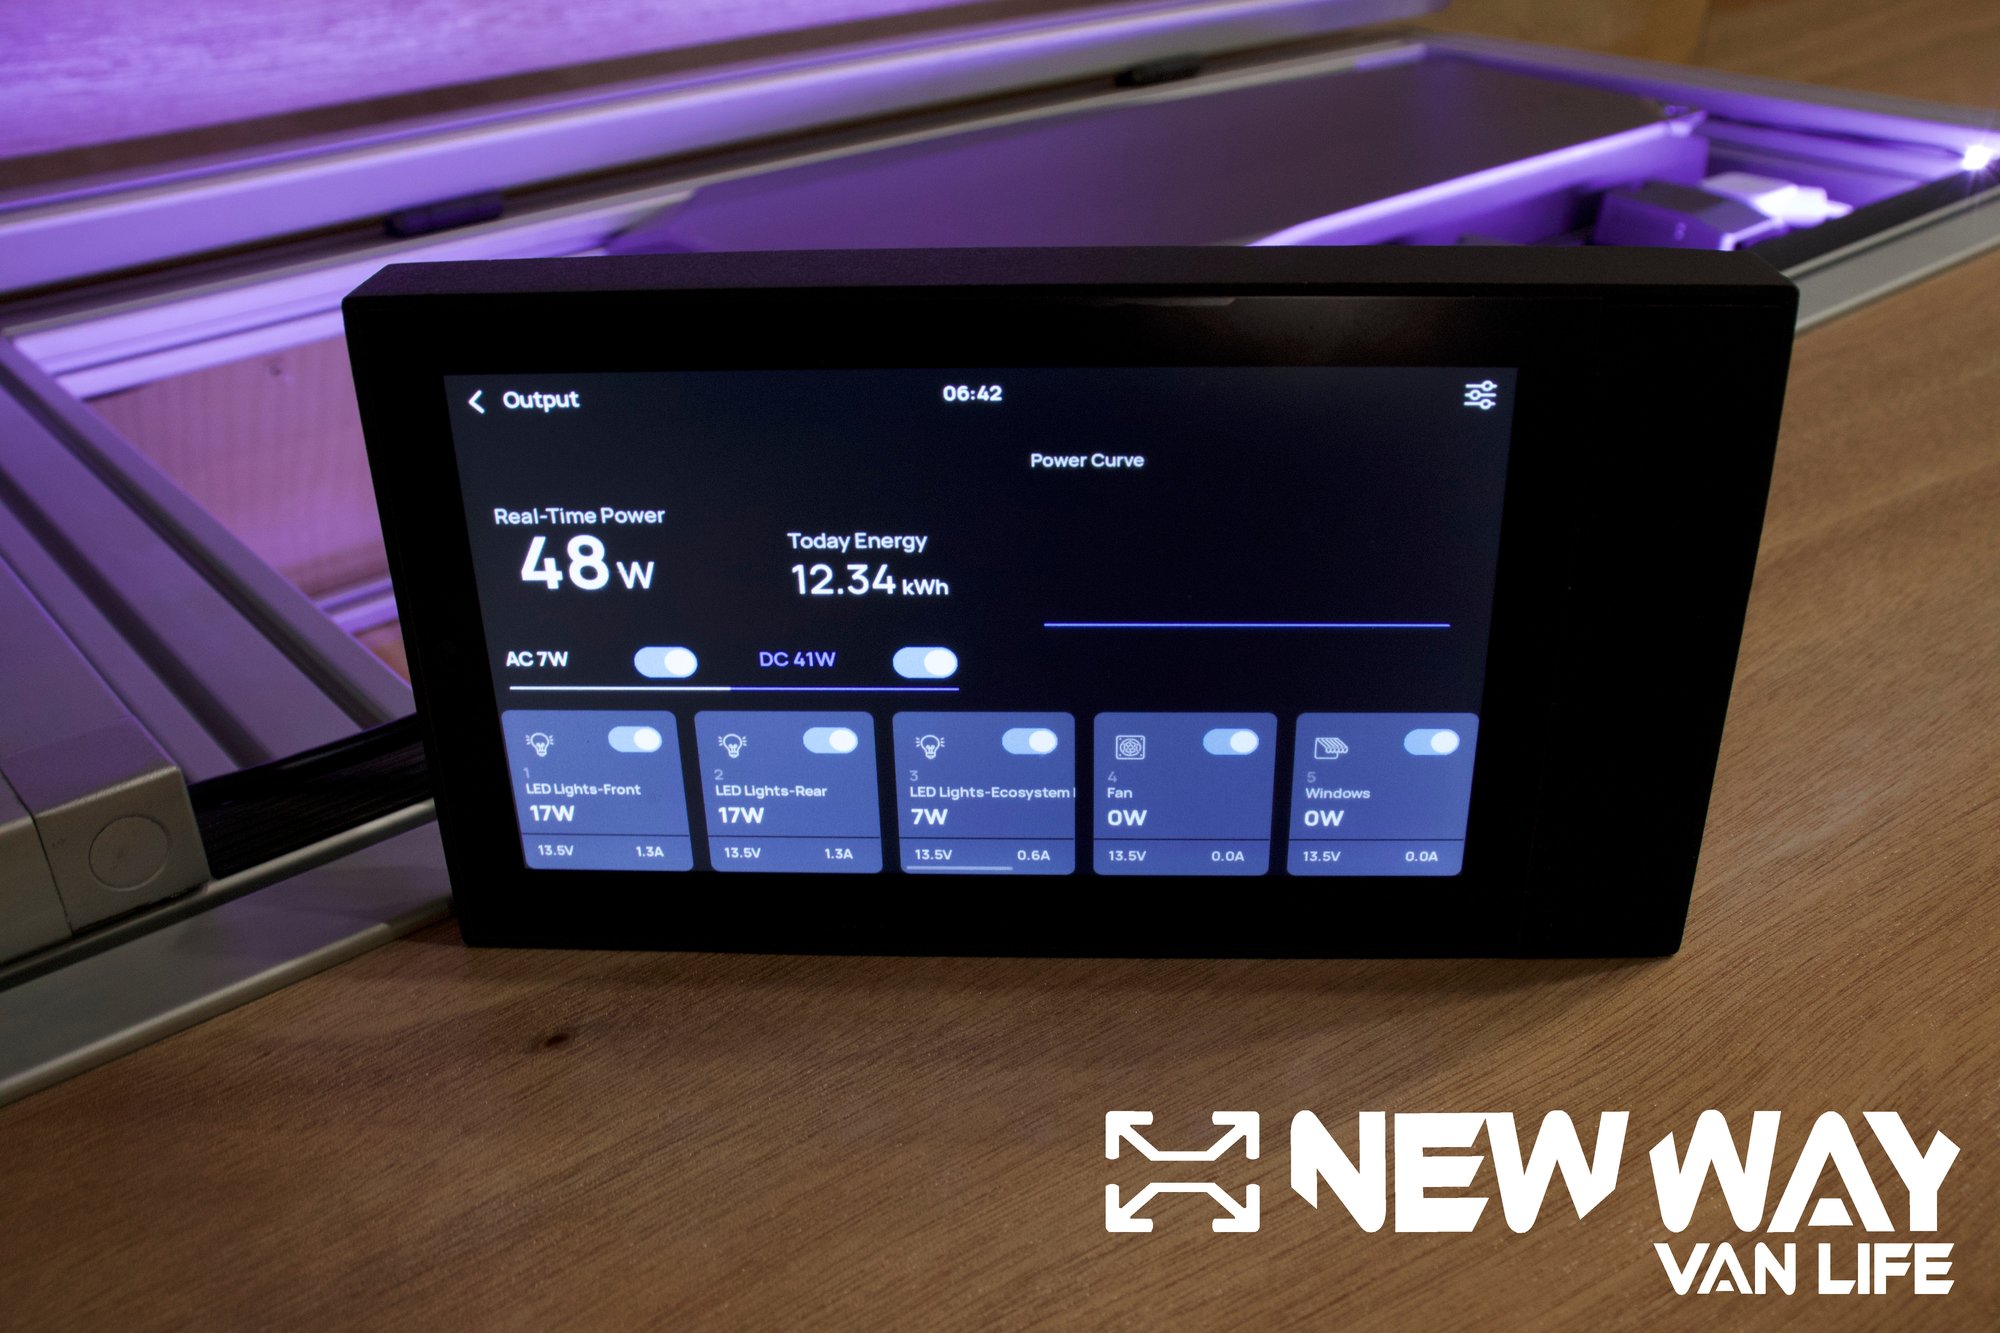
When you explore the Output section of the device, the first thing you notice is Real-Time Power, which is the total watts your system is outputting to the connected circuits. Next to that is Today Energy, a feature that is also not working currently in this section, however we assume it will display how much energy you consumed that day. Next to these values is a graph that shows the total load on the system. In the lower part of the Output section you can see the AC and DC specific draw in watts and on/off toggle buttons for both currents respectively. When you choose either AC or DC it shows you all of the circuits for that current. Each circuit, whether it is AC or DC, has customizable options within the device that allow you to name each circuit and choose a specialized icon for quick identification of the circuit you're looking at.
In addition to customizing each circuit, with a quick look you can monitor each of them in this section on the Control Console. You can view each circuit’s wattage, voltage, amperage, and furthermore, six of the twelve circuits on the DC side can be controlled remotely through toggle switches. Finally, in the output section is one last customization option, on the top right there is a settings icon which opens a slider where you can change your DC voltage from 12v to 24v.
Thanks for sticking around as we continue to explore EcoFlow’s new Power Kit! If you want to learn more, check out our other blog articles exploring the 2kWh/5kWh batteries, Smart Distribution Panel, and the Power Hub. Subscribe to our YouTube channel and watch hands-on videos of each of these components. Stay tuned for the next post and for our New Way Van Life pre-engineered complete van conversion kits coming very soon!
